
TL;DR
Moving your rig into a closet can dramatically reduce noise and improve recordings. The trick is balancing acoustic dampening with proper ventilation and strategic placement—absorption alone isn’t enough for true soundproofing.
Ever wondered if you can turn a closet into a legit recording space without turning your whole apartment into a noisy echo chamber? The answer is yes—if you know the secret sauce: understanding where noise comes from and how to control it. It’s not just about sticking foam panels on the walls; it’s about smart placement, sealing gaps, and managing heat.
In this guide, you’ll learn why the biggest gains come from moving your rig away from your ears, how to set up a “rig in the closet” without cooking your gear, and where to focus your dampening efforts for real results. Ready to make your closet work for you—quietly and comfortably? Let’s go.
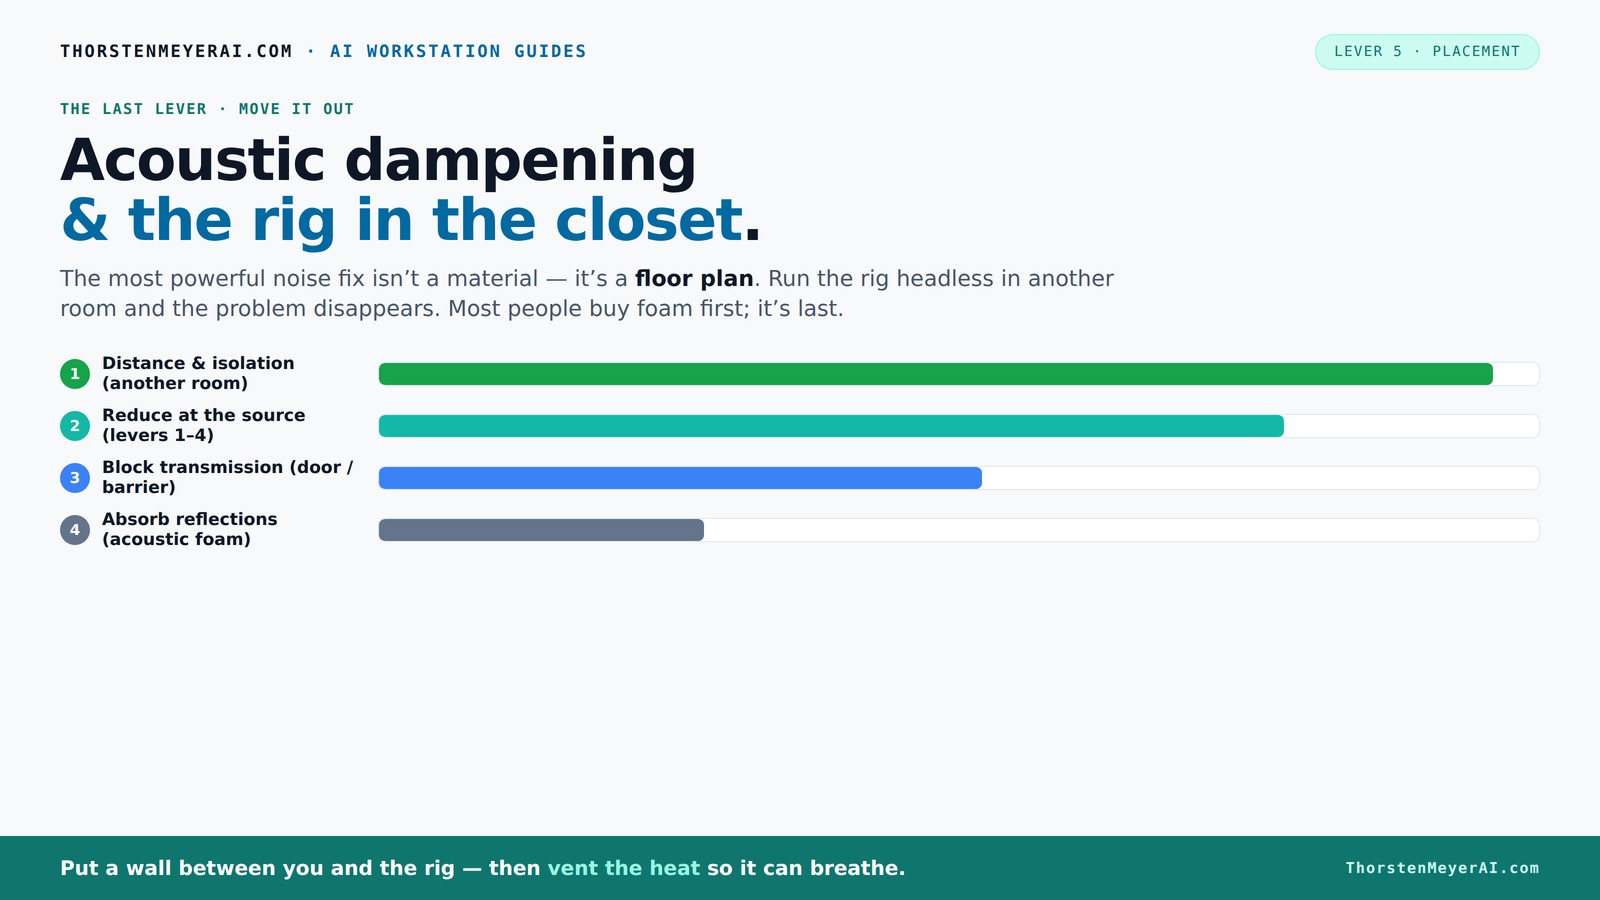
Acoustic dampening
& the rig in the closet.
The most powerful noise fix isn’t a material — it’s a floor plan. A rig you can’t hear because it’s in another room beats any amount of foam. Tap the approaches in Part 1 to see what actually works.
(another room)
(levers 1–4)
(door / barrier)
(acoustic foam)
Contain the noise, not the heat
Key Takeaways
- Moving your rig into another room or closet is the most impactful step for noise reduction.
- Proper ventilation is critical—sealed closets without airflow trap heat and damage gear.
- Acoustic dampening reduces echo but doesn’t block sound transfer; sealing gaps and adding mass are necessary for true soundproofing.
- Placement of acoustic panels at reflection points yields the best sound quality in small spaces.
- Budget-friendly solutions like blankets, rugs, and foam panels can dramatically improve sound without breaking the bank.

Focusound 52 Pack Acoustic Foam Panels 1" x 12" x 12" Sound Proof Foam Panles Soundproofing Noise Cancelling Wedge Panels for Home Office Recoding Studio with 300PCS Double-Side Adhesive
Soundproofing - Acoustic foam panels triangular grooves structure for better noise absorption, helps to reduce and absorb unwanted...
As an affiliate, we earn on qualifying purchases.
As an affiliate, we earn on qualifying purchases.
Why Moving Your Rig Is the Biggest Noise Hack
Want to cut noise faster? Just move your gear away from your ears. Distance is the most effective way to reduce sound — period. Think of it like a loud neighbor: if you put a wall between you, the noise drops dramatically.
For an AI workstation or any loud rig, the best move is to set it up in another room, basement, or closet. You can SSH in or use a network connection. Your workspace stays silent while the rig roars in another space. This simple shift makes any foam or acoustic treatment almost irrelevant.
Imagine having a GPU that hits 80°C and 200W of heat. If you put it in a closet with ventilation, the noise and heat stay contained and less noticeable. This is the #1 tip that most pros use—keep the noise away from where you work.
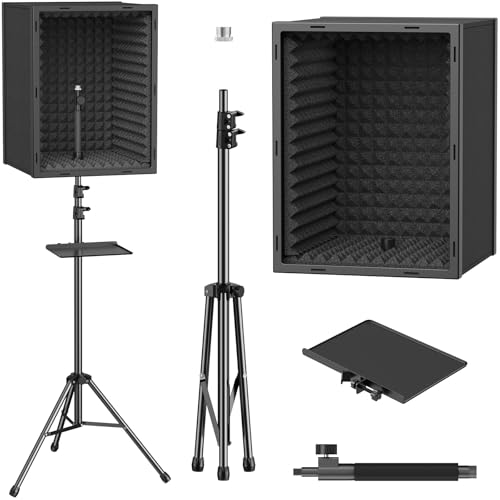
TONOR Personal Vocal Booth, Microphone Isolation Shield for Studio, Framed Acoustic Foam Box, Sound Absorbing, for Professional Recording, Podcast, Singing, Adjustable Height, Max 190 cm/53.1inch
Sound Absorption & Isolation: This vocal booth features a box design combining five high-density foam and sound absorbing...
As an affiliate, we earn on qualifying purchases.
As an affiliate, we earn on qualifying purchases.
The 'Rig in the Closet': How to Do It Right Without Cooking Your Gear
Placing a hot, noisy machine inside a closet sounds perfect—quiet and out of sight. But the biggest mistake is sealing it tight without ventilation. Without airflow, heat builds up fast, throttling your hardware and making the fans scream.
To avoid this, you need a setup that breathes. Think of installing a small exhaust fan, or at least a passive vent that lets hot air escape while bringing in cooler air. Many pros use purpose-built soundproof cabinets that combine foam with ducted airflow and thermostatic fans. This keeps your rig cool and quiet.
For example, a sealed closet with a simple vent pipe and a quiet exhaust fan can keep your GPU at safe temperatures—around 70°C—while reducing noise by up to 36 dB. Check out this guide on cooling and noise for detailed plans.

8 Pack - Bass Traps Acoustic Foam Corner, 8''x8''x12'' Black Bass Traps Corner Studio Foam, High Density and Fire-Proof Acoustic Panels Recording Studio Acoustical Treatments
Acoustic Principle- Bass Trap is a kind of sound absorbing structure specially used to absorb specific low-frequency standing...
As an affiliate, we earn on qualifying purchases.
As an affiliate, we earn on qualifying purchases.
Acoustic Dampening vs. Soundproofing: What’s the Difference?
Acoustic dampening and soundproofing are often confused, but they serve different goals. Dampening means reducing echo and reflections inside a space—making it sound less 'live.' Soundproofing involves blocking sound from passing through walls or doors.
Understanding this distinction is crucial because applying dampening materials alone might improve how your recordings sound internally but won't prevent noise from leaking out or external noise from entering. For example, foam panels can tame internal echo, but if your door has gaps, sound will still escape. Conversely, adding mass or sealing gaps can significantly reduce noise transmission but won't necessarily improve the sound quality inside the space.
For a closet, the key is to realize that both are necessary: dampening creates a controlled acoustic environment, while soundproofing ensures that noise stays in or out. Ignoring one for the other can lead to subpar results—either a room that sounds echoey or one that leaks noise, defeating the purpose of a quiet setup. The tradeoff is often space and cost; better soundproofing usually requires more materials and effort, but it’s essential for truly silent recordings or quiet environments.

Weather Stripping Door Seal Strip - Soundproof Q-Shaped Foam for Exterior Door Frame, Large Gap Seal, Noise Cancelling, Easy to Install (Black, 26FT)
No light penetration: Our door seals are made of high-density foam core material, which effectively blocks light from...
As an affiliate, we earn on qualifying purchases.
As an affiliate, we earn on qualifying purchases.
Placement Hacks: Where to Put Acoustic Treatment in a Closet
Want to get the most out of your closet treatment? Start with the reflection points. The first step: position your mic and then treat the wall directly behind it. That’s where the strongest reflections bounce back into your mic. Placement of acoustic treatment is key.
Next, target side wall reflection points—place panels where sound ricochets from your desk or mic stand. Ceiling reflections matter too, especially if you’re recording vocals or voiceovers. A simple trick: sit in your usual position, clap loudly, and observe where the sound bounces—those are your reflection zones.
In a small closet, bass buildup can be a problem. Use bass traps in the upper corners to tame low frequencies. Remember, coverage beats thickness; a few well-placed panels do more than a giant foam block in the corner.
Understanding where to place your treatment is vital because improper placement can lead to uneven sound, muddiness, or lingering echoes that distort recordings. The goal is to target the primary reflection points to absorb the most problematic echoes and improve clarity. Covering these spots ensures more accurate sound capture and a more controlled environment, which is essential in tight spaces like closets.
Tools for a Budget-Friendly Closet Setup
On a budget? No problem. Start with heavy blankets or moving quilts to wrap the closet walls. They absorb reflections and cut noise transfer. Cover the door with a thick curtain or a DIY draft stopper—gaps are your enemy. For more tips, see reviews of soundproofing solutions.
Add acoustic panels if you can—many affordable options exist that work well in small spaces. Place rugs on the floor to soften harsh reflections and reduce footfall noise. For low-frequency control, stack some bass traps in the corners, or DIY with dense foam and rockwool.
Remember: sealing gaps with weatherstripping and using rubber feet under your gear can make a surprising difference—no need to spend a fortune. These inexpensive methods often provide the most noticeable improvements because they prevent sound leaks and reduce unwanted reflections, which are often overlooked in budget setups. The tradeoff is that while they may not fully soundproof a space, they significantly enhance the acoustic environment, making your recordings clearer and quieter overall.
Advanced Tips: Combining Absorption, Isolation, and Ventilation
The best closet setup balances absorbing sound, isolating noise leaks, and managing heat. Use a mix of acoustic panels, bass traps, and heavy blankets to tame reflections. Seal gaps with weatherstripping and add mass with drywall or Green Glue for better isolation.
Vibration isolation is often overlooked: place your gear on rubber pads or anti-vibration mounts to stop low-frequency transfer through the floor or desk. This prevents vibrations from traveling through structures, which can cause additional noise and muddiness in recordings.
For heat, consider an exhaust fan with a thermostat—it's the difference between a quiet, cool rig and a overheated, loud one. These hybrid solutions—combining soundproofing, absorption, and cooling—are what turn a closet into a professional-grade studio. They help prevent heat buildup that can damage hardware and keep noise levels down, ensuring your setup remains both silent and safe. The tradeoff is complexity and cost, but the results are well worth it for a dedicated, high-quality workspace.
Check out this detailed guide on hybrid acoustic and cooling setups for full plans.
Frequently Asked Questions
Can I really turn a closet into a vocal booth?
Yes. With strategic placement, absorption treatments, and sealing gaps, a closet can become a surprisingly effective vocal booth—especially for voice-overs, podcasts, or recording instruments.What’s the difference between acoustic treatment and soundproofing?
Acoustic treatment reduces echo and reflections inside a space, making it sound better. Soundproofing blocks sound from passing through walls, doors, or gaps. Both are needed for a quiet, professional setup.Where should I place acoustic panels in my closet?
Start with the wall behind your mic, then treat side reflection points, the ceiling, and corners for bass traps. Use a mirror trick to identify spots where sound bounces directly into your mic.Do I need bass traps in a small closet?
In most cases, yes. Small closets tend to accumulate low frequencies, creating muddiness. Bass traps in the upper corners help control these low-end issues.How do I stop sound from leaking through the closet door?
Seal gaps with weatherstripping, add a heavy curtain, or install a solid-core door with proper sealing. These steps significantly cut down on noise escaping.Conclusion
If you want a quiet, effective closet studio, don’t just slap foam on the walls. Focus on moving your rig away, sealing gaps, and providing ventilation. These simple steps turn a tight closet into a powerful, silent workspace.
Imagine your gear humming happily in a well-ventilated, treated closet while you record with clarity and peace. That’s the secret—balance dampening, isolation, and airflow for results that last.